Improving your home does not always require a major renovation, expensive materials, or a contractor. In many cases, small changes can make a room more comfortable, organized, and attractive without putting unnecessary pressure on your budget.
The smartest home improvement projects are not necessarily the ones that look impressive on social media. They are the ones that solve everyday problems, prevent avoidable maintenance costs, and make your home easier to live in.
If you are looking for budget-friendly home improvement ideas, start by identifying what bothers you most about your space. Is a room too dark? Is your electricity bill higher than expected? Do you constantly struggle with clutter? Does a door stick, or does a bathroom need better ventilation?
Once you know the problem, you can choose an improvement that delivers a practical benefit instead of spending money on changes you do not really need.
Here are nine affordable home upgrades worth considering, along with advice on where to spend, where to save, and what to avoid.
1. Improve Your Lighting Before Changing Your Furniture
A room can feel outdated simply because its lighting is poor. Before buying new furniture or repainting the entire space, examine how the room is illuminated.
Start with three simple improvements:
- Replace outdated bulbs with energy-efficient LED bulbs that suit the fixture.
- Add a task light near a reading chair, desk, or kitchen work surface.
- Use lamps or indirect lighting to make dark corners more comfortable.
Pay attention to color temperature. Warm lighting can create a relaxed atmosphere in living areas, while neutral or cooler lighting may be more suitable for workspaces.
You do not need to install expensive ceiling fixtures to make a room feel different. Sometimes, changing a few bulbs and placing a lamp in the right position is enough.
Money-saving tip: Check the bulb type, brightness, and dimmer compatibility before purchasing replacements. Buying the wrong bulbs can turn a simple upgrade into an unnecessary expense.
2. Seal Drafts and Fix Small Air Leaks
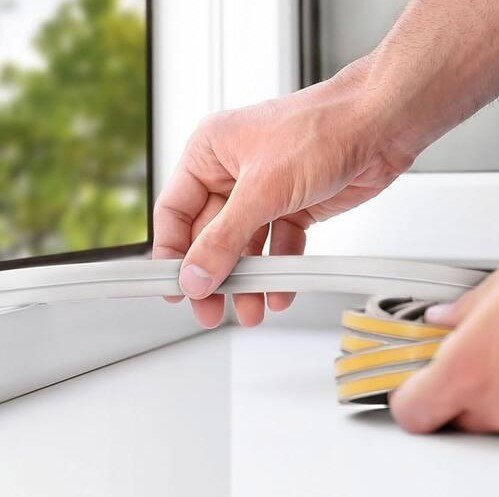
Small gaps around windows and exterior doors can allow unwanted air to enter or conditioned air to escape. This can make rooms uncomfortable and increase heating or cooling demand.
Inspect the areas around your windows, door frames, and other accessible openings. Look for damaged weatherstripping, loose seals, and visible gaps.
For suitable locations, inexpensive weatherstripping or caulk can help reduce air leakage. Choose a product designed for the material and location where it will be installed.
However, do not seal every opening without understanding its purpose. Bathrooms, kitchens, and other areas may require ventilation, and combustion appliances can have specific air-supply requirements.
A practical approach: Fix obvious, accessible leaks first. If the problem involves a roof, structural movement, moisture entering walls, or a gas appliance, get the underlying issue assessed rather than covering it up.
3. Refresh Cabinets Instead of Replacing Them
Kitchen and bathroom cabinets can make an entire room look tired, even when their structure is still in good condition.
If cabinet boxes and doors are sound, consider cleaning them thoroughly, adjusting loose hinges, replacing worn handles, or refinishing the surfaces.
New hardware can create a noticeable change for a relatively small cost. A consistent finish across cabinet handles, drawer pulls, and other visible fittings can also make the room look more coordinated.
Painting cabinets may be another option, but preparation matters. Grease, dust, and poorly prepared surfaces can cause paint to peel.
Before starting, check whether the existing finish can be painted and choose a suitable primer and coating. Test the process on an inconspicuous area.
When replacement makes sense: Cabinets with serious water damage, unsafe mounting, or deteriorating structural components may need repair or replacement. Cosmetic improvements should not hide these problems.
4. Add Storage Where Clutter Actually Builds Up
Many homes do not need more square footage. They need better use of the space they already have.
Observe where clutter repeatedly collects. It might be shoes near the entrance, cleaning supplies under the sink, or miscellaneous items on a bedroom dresser.
Then create storage specifically for that problem.
Affordable options include:
- Hooks near the entrance for frequently used bags and coats.
- Drawer organizers for small household items.
- Shelving in suitable closets.
- Labeled containers for seasonal belongings.
- Under-bed storage for items used occasionally.
The key is to make everyday items easy to put away. Storage that is difficult to access often becomes another place where clutter accumulates.
Before buying organizers, measure the available space and sort through what you actually need to keep. Buying storage products before decluttering can waste money and create more mess.
5. Make Walls Look Better With Targeted Painting
A fresh coat of paint can improve the appearance of a room, but painting every wall is not always necessary.
Start with the surfaces that have visible marks, fading, or damage. A carefully chosen accent wall, refreshed trim, or a small entryway can provide a noticeable improvement without requiring a large quantity of paint.
Choose a finish appropriate for the surface and the room. Areas exposed to frequent cleaning may need a more durable coating than a low-traffic decorative wall.
Preparation is just as important as the paint itself. Clean the surface, repair suitable minor imperfections, and use the appropriate primer.
If the home is older, investigate the possibility of hazardous paint before sanding or scraping. Do not disturb potentially lead-containing paint without following the applicable safety requirements.
Budget tip: Calculate the surface area before purchasing paint. Buying more than necessary can leave you with unused cans, while buying too little may create color differences between batches.
6. Improve Bathroom Ventilation and Fix Minor Leaks
A bathroom can look clean while still having a moisture problem.
Persistent condensation, musty odors, peeling paint, or recurring mold can indicate inadequate ventilation or an underlying leak.
Start by checking whether the existing exhaust fan works properly and whether it moves air to an appropriate exterior outlet. Clean accessible dust from the fan according to the manufacturer’s instructions.
Also inspect visible plumbing connections, faucets, and the areas around the sink. A small leak may waste water and damage cabinets or flooring over time.
Replace worn washers or suitable faucet components only when the repair is within your ability and the water supply can be safely isolated.
Do not simply paint over recurring mold or water stains. Identify and address the moisture source first. Extensive mold, concealed water damage, or persistent leaks may require a qualified professional.
For more information on preventing mold and moisture problems in your bathroom, consult the U.S. Environmental Protection Agency’s guidance.
7. Upgrade Your Entryway for Everyday Convenience
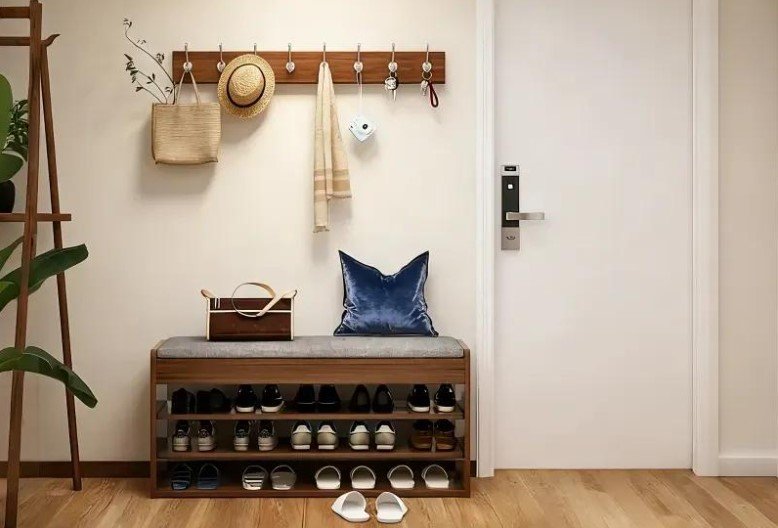
The entrance to your home affects how organized the entire space feels.
You do not need a custom-built hallway to improve it. A small collection of practical features can make a difference:
- A durable mat to catch dirt.
- A wall-mounted hook or suitable coat rack.
- A compact shoe organizer.
- A small tray for keys and frequently used items.
Choose items that fit the available space without blocking doors or creating a trip hazard.
If your entryway is narrow, use vertical storage rather than adding bulky furniture. Keep frequently used belongings within easy reach and leave a clear path for people entering or leaving.
This is a particularly useful project for renters because many improvements can be made with removable or freestanding products, subject to the property’s rules.
8. Reduce Energy Waste With Simple Efficiency Checks
An attractive home is not necessarily an efficient one. Some of the most useful improvements are the ones that reduce wasted energy.
Start with a few basic checks:
- Switch off lights in unoccupied rooms when appropriate.
- Use LED lighting in frequently used fixtures.
- Check that heating and cooling equipment has clean, correctly installed filters, following the manufacturer’s guidance.
- Avoid blocking supply and return air vents.
- Review whether your thermostat settings suit your household’s routine.
If you are considering a larger upgrade, compare the initial cost with the likely operating savings.
For example, replacing an inefficient appliance may be worthwhile if it is used frequently and the new model delivers meaningful efficiency improvements. However, an appliance that is rarely used may not justify an expensive replacement purely for energy savings.
For more detailed guidance, consult the U.S. Department of Energy’s resources on home energy efficiency.
9. Repair Small Problems Before They Become Expensive
One of the most overlooked home improvement strategies is preventive maintenance.
A loose handrail, damaged seal, dripping faucet, or deteriorating patch of exterior paint may seem unimportant. However, ignoring a problem can allow it to become more expensive or create a safety concern.
Create a short maintenance list and inspect your home periodically.
Prioritize problems in this order:
- Safety issues, including loose railings and damaged electrical components.
- Water-related problems, including active leaks and signs of moisture intrusion.
- Damage that could spread, such as deteriorating exterior finishes.
- Cosmetic issues that do not affect the home’s function.
Do not attempt repairs that require specialized electrical, plumbing, structural, or other licensed work unless you are qualified and local regulations permit it.
The objective is not to repair everything yourself. It is to recognize problems early enough to make informed decisions.
How to Choose the Right Home Improvement Project
If your budget is limited, do not try to complete all nine upgrades at once.
Use this simple decision process:
Step 1: Identify the problem. Write down the one thing that makes your home less comfortable, less functional, or harder to maintain.
Step 2: Check whether it is cosmetic or functional. A scratched cabinet door is different from a cabinet damaged by a leak. Address the cause before improving the appearance.
Step 3: Estimate the full cost. Include materials, tools, delivery, disposal, and any professional help you may need.
Step 4: Consider the result. Will the project improve comfort, prevent damage, reduce waste, or make daily tasks easier?
Step 5: Start with one manageable upgrade. Complete it properly before moving on to the next project.
This approach helps prevent a common mistake: starting several renovations, spending money on materials, and leaving the home full of unfinished work.
Final Thoughts
The best budget-friendly home improvement ideas are the ones that make your home work better for you.
You may get more value from repairing a leaking faucet, improving a dark room, organizing a cluttered entrance, or sealing an appropriate draft than from purchasing expensive decorative items.
Before starting your next project, identify the problem, set a realistic budget, and choose a solution that addresses the cause rather than just the appearance.
A comfortable, functional home is built through thoughtful decisions and consistent maintenance—not necessarily through expensive renovations.