1. Introduction: A Step-by-Step Installation Guide for Your New AV Tub
Welcome to our step-by-step installation guide for your new AV Tub! If you’re looking to upgrade your bathroom and create a luxurious spa-like experience, an AV Tub is the perfect addition. In this blog post, we will walk you through the entire installation process, from start to finish. So grab your tools and let’s get started on transforming your bathroom into a tranquil oasis!
2. What is an AV Tub?
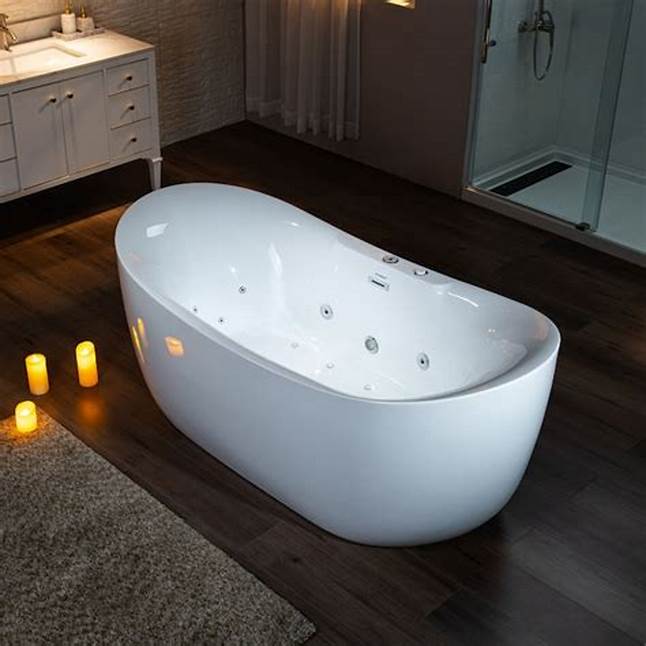
An AV tub, short for audio-visual tub, is a modern and luxurious addition to any bathroom. It combines the relaxation of a traditional bathtub with integrated audio and visual features. Imagine soaking in warm water while enjoying your favorite music or watching a movie on a built-in screen – it’s like having your own personal spa experience at home!
The AV tub typically comes equipped with high-quality speakers and Bluetooth connectivity, allowing you to easily connect your smartphone or other devices to play music or stream videos. Some models even have LED lights that can be customized to create different moods and enhance the ambiance of your bath time.
These innovative tubs are designed with comfort in mind, often featuring ergonomic shapes and adjustable jets for hydrotherapy massage. The soothing combination of warm water, soothing sounds, and captivating visuals can help melt away stress and promote relaxation.
Whether you’re looking to unwind after a long day or simply enjoy some indulgent self-care time, an AV tub offers the ultimate sensory experience right in the comfort of your own bathroom. So why settle for ordinary when you can elevate your bathing routine with the immersive luxury of an AV tub?
3. Benefits of Installing an AV Tub
1. Ultimate Relaxation: One of the biggest benefits of installing an AV tub is the ultimate relaxation it provides. The combination of warm water and soothing jets creates a spa-like experience right in your own home. You can unwind after a long day, relieve muscle tension, and enjoy some much-needed me-time.
2. Therapeutic Benefits: AV tubs are not just for relaxation; they also offer therapeutic benefits. The hydrotherapy jets target specific areas of your body, providing relief from sore muscles, arthritis pain, and even stress-related conditions like anxiety or insomnia. Regular use can improve blood circulation and promote overall well-being.
3. Entertainment Options: Unlike traditional tubs, AV tubs come with built-in entertainment features such as audio systems and LED lights. You can listen to your favorite music or podcast while enjoying a luxurious soak in the tub. The LED lights create a calming ambiance that enhances the overall experience.
4. Increased Home Value: Installing an AV tub can significantly increase the value of your home. It adds a touch of luxury and sophistication to any bathroom space, making it more appealing to potential buyers if you ever decide to sell your property.
5.Low Maintenance: Despite their advanced features, AV tubs are designed for easy maintenance. Most models have self-cleaning capabilities that save you time and effort in cleaning the tub regularly.
4. Required Tools and Materials
When it comes to installing your new AV tub, having the right tools and materials is essential. Here’s a list of what you’ll need:
1. Adjustable wrench: This versatile tool will help you tighten and loosen nuts and bolts.
2. Screwdriver set: Make sure you have both flathead and Phillips head screwdrivers for various tasks.
3. Pipe wrench: This specialized tool is necessary for working with pipes and fittings.
4. Level: To ensure that your tub is installed properly, a level will help you check for any unevenness.
5. Measuring tape: Accurate measurements are crucial when installing an AV tub, so make sure to have a measuring tape on hand.
In addition to the tools mentioned above, you’ll also need some materials:
1. Tub installation kit: This typically includes screws, brackets, and other hardware specific to your AV tub model.
2. Plumbers putty or silicone caulk: These will be needed for sealing joints and preventing leaks.
3. PVC pipe cement: If your plumbing system uses PVC pipes, this adhesive will secure them together.
By gathering these tools and materials beforehand, you’ll be well-prepared to tackle the installation process smoothly without any unnecessary delays or trips to the hardware store!
5. Preparing the Installation Area
Preparing the installation area is an essential step in ensuring a smooth and successful AV tub installation. Before you begin, make sure you have all the necessary tools and materials at hand.
Clear out any clutter or obstacles from the bathroom to create a clean workspace. Remove any cabinets or fixtures that may interfere with the installation process.
Next, measure the dimensions of your new AV tub and mark them on the floor using masking tape or chalk. This will give you a visual guide for positioning and aligning the tub later on.
Now it’s time to assess the condition of your subfloor. Ensure that it is level, sturdy, and free from any damage or rot. If necessary, repair or reinforce it before proceeding with the installation.
If you are installing an AV tub in a newly constructed bathroom, ensure that all plumbing lines are properly installed and connected before moving forward. If there are existing plumbing connections from an old tub that needs to be removed, cap them off securely to avoid leaks.
Check for any electrical outlets near the installation area. Make sure they are properly grounded and meet safety regulations if they need to be relocated.
By taking these steps to prepare your installation area beforehand, you’ll set yourself up for a smoother and more efficient AV tub installation process.
6. Removing the Old Tub (if applicable)
Removing the old tub, if applicable, is an important step in installing your new AV tub. Before you begin this process, make sure to turn off the water supply and disconnect any plumbing connections. It’s also a good idea to lay down protective sheets or towels to catch any debris or water that may spill during the removal.
To start, remove any fixtures attached to the old tub such as faucets and handles. Use a wrench or pliers to loosen and disconnect these parts carefully. Next, locate the drain stopper mechanism underneath the tub and remove it by unscrewing it counterclockwise.
Now it’s time to detach the old tub from its surrounding walls. Start by removing any caulking or adhesive around the edges of the tub using a putty knife or scraper tool. Once all of these attachments have been loosened, you can begin lifting and maneuvering the old tub out of its space.
Be cautious when removing heavy objects like bathtubs as they can cause injury if not handled properly. Enlist help if needed and use caution throughout this process.
Once removed, assess if there are any repairs needed on your subfloor before proceeding with installation of your new AV tub.
7. Installing the AV Tub
Now that you have prepared the installation area and removed the old tub (if applicable), it’s time to install your brand new AV Tub. Follow these step-by-step instructions to ensure a successful installation.
1. Positioning: Carefully place the tub in its designated spot, making sure it is level and aligned with the plumbing connections. Use a spirit level to double-check.
2. Connect Plumbing: Attach the water supply lines and drain pipes according to manufacturer’s instructions. Make sure all connections are secure and leak-free.
3. Secure Anchoring: To prevent any movement or shifting, secure the tub in place by using adjustable feet or brackets provided with your AV Tub kit. Ensure that it is firmly anchored for stability.
4. Electrical Connections: If your AV Tub has built-in features such as jets, lights, or audio systems, follow electrical wiring guidelines provided by the manufacturer or hire a professional electrician for safety reasons.
5. Test Run: Before sealing up any access panels or finishing touches, test run your AV Tub to check if everything is functioning properly – including water flow, jet operation, lighting effects, and sound system functionality.
8. Connecting Plumbing and Drainage
Connecting the plumbing and drainage is a crucial step in the installation of your new AV tub. Properly connecting these systems ensures that water flows smoothly and efficiently, allowing you to fully enjoy your bathing experience.
Ensure that all necessary plumbing fixtures are in place before proceeding with the connection. This includes hot and cold water supply lines, as well as any additional features such as jets or sprayers. It’s important to follow manufacturer instructions for proper placement and connection of these fixtures.
Next, connect the supply lines to their respective valves using appropriate fittings. Use plumber’s tape or thread sealant to create a tight seal and prevent leaks. Double-check that all connections are secure before moving on.
For drainage, install a waste pipe that meets local building codes and regulations. Connect it securely to the drain outlet of your AV tub using suitable connectors or adapters. Again, make sure all connections are tight and leak-free.
Consider installing an overflow system if your AV tub is equipped with one. This helps prevent overfilling by diverting excess water back into the drain system.
Test the plumbing connections by turning on both hot and cold water faucets simultaneously while checking for leaks at each connection point. Adjust any loose fittings accordingly until there are no signs of leakage.
Remember to consult a professional plumber if you’re unsure about any aspect of this process or if you encounter any difficulties during installation.
9. Securing the Tub in Place
Once you have successfully installed the AV tub in your bathroom, it’s time to secure it in place to ensure stability and safety. This step is crucial to prevent any accidents or damage.
To begin, check that the tub is level using a carpenter’s level. Adjust as needed by adding shims under the feet of the tub until it is perfectly level.
Next, use a drill with appropriate screws to secure the flanges of the tub to the walls. Make sure to follow manufacturer instructions regarding screw placement and spacing.
After securing the flanges, apply a waterproof sealant around all edges of the tub where it meets with walls or other surfaces. This will help prevent water leakage and moisture damage.
Double-check that all connections are tight and secure before moving on to further steps in your installation process.
By properly securing your AV tub, you can enjoy peace of mind knowing that it will stay firmly in place for years of comfortable bathing experiences.
10. Testing and Adjusting the Tub
Testing and adjusting the tub is a crucial step in the installation process to ensure that it functions properly. Here’s what you need to do:
1. Fill the tub with water: Begin by filling the AV tub with water up to its recommended capacity. This will help you test for any leaks or issues before finalizing the installation.
2. Check for leakage: Carefully inspect all connections, including faucets, pipes, and drains, while the tub is filled with water. Look out for any signs of leakage such as dripping or pooling water.
3. Test jets and air systems: Turn on the jets and air systems to make sure they are functioning correctly. Adjust their settings according to your preference and check if they provide adequate pressure and circulation.
4. Assess temperature control: Test both hot and cold water controls to ensure they are working effectively. Verify that you can adjust the temperature easily without any glitches.
5. Evaluate sound system (if applicable): If your AV tub comes equipped with a built-in sound system, test it out during this stage too! Connect your preferred device via Bluetooth or auxiliary cable, play some music, and assess the quality of sound produced.
6. Fine-tune adjustments: Make any necessary adjustments based on your testing observations – tighten loose connections, fix minor leaks if found, or consult professional assistance if major issues arise.
By thoroughly testing and adjusting your new AV tub before completing installation, you’ll be able to enjoy its features without encountering unexpected problems down the line!
11. Sealing and Finishing Touches
Now that you’ve successfully installed your new AV tub, it’s time to add the finishing touches to ensure a secure and leak-free installation. This step is crucial in maintaining the longevity of your tub and preventing any water damage or potential leaks.
Carefully inspect all the connections and joints for any signs of leakage. Make sure everything is tightly sealed using plumber’s tape or sealant if necessary. It’s important to double-check every connection to guarantee a watertight seal.
Next, apply silicone caulk around the perimeter of the tub where it meets the walls or floor. This will create an additional barrier against water seepage and provide a clean, finished look.
Once you’ve applied the caulk, smooth out any excess with a caulk smoothing tool or your finger. This will give it a professional finish while ensuring there are no gaps or uneven patches.
After sealing, allow ample drying time as per manufacturer instructions before using your AV tub again. Rushing this process could compromise its effectiveness in keeping water contained within the tub.
Take some time to clean up any debris left from the installation process. Wipe down surfaces thoroughly with a damp cloth and remove any excess caulking or adhesive residue for a pristine final result.
By following these steps for sealing and adding those essential finishing touches, you can enjoy peace of mind knowing that your AV tub is securely installed and ready for use!
12. Maintenance Tips for Your AV Tub
Proper maintenance is essential to keep your AV tub in optimal condition and ensure its longevity. Follow these maintenance tips to keep your tub looking clean and functioning smoothly.
1. Regular Cleaning: To prevent the buildup of dirt, grime, and soap scum, it’s important to regularly clean your AV tub. Use a non-abrasive cleaner or a mild detergent specifically designed for acrylic surfaces. Avoid using harsh chemicals or abrasive scrub brushes that can damage the surface.
2. Prevent Stains: To avoid staining, wipe down the tub after each use with a soft cloth or sponge. For stubborn stains, create a paste using baking soda and water, apply it to the stain, let it sit for 15 minutes, then gently scrub with a soft brush before rinsing off.
3. Maintain Water Quality: Keep an eye on the water quality in your AV tub by testing it regularly and adjusting chemical levels as needed. Properly balanced water will not only protect your tub but also provide a safe and enjoyable soaking experience.
4. Check Jets and Filters: Periodically inspect the jets and filters of your AV tub to ensure they are free from debris or blockages that could impede their performance. Clean them thoroughly according to manufacturer guidelines.
5. Lubricate Moving Parts: Apply silicone-based lubricant to any moving parts such as hinges or jets that may require occasional lubrication. This will help maintain smooth operation while preventing rust or corrosion.
By following these simple maintenance tips, you can enjoy years of relaxation in your AV tub without encountering major issues or costly repairs.
13. Conclusion: Enjoy Your New AV Tub!
Congratulations on successfully installing your new AV tub! By following this step-by-step installation guide, you have created a luxurious and relaxing addition to your bathroom. Now, it’s time to sit back, unwind, and enjoy the benefits of your new AV tub.
With its built-in audiovisual features, the AV tub provides an immersive bathing experience like no other. Whether you want to listen to soothing music or watch your favorite movie while soaking in warm water, this innovative technology will enhance your relaxation time.
Remember that regular maintenance is key to keeping your AV tub in optimal condition. Clean it regularly using non-abrasive cleaners and avoid using harsh chemicals that can damage the audiovisual components. Additionally, ensure proper ventilation in your bathroom to prevent any moisture-related issues.
If you encounter any technical difficulties with your AV tub or need assistance with troubleshooting, consult the manufacturer’s instructions or reach out to their customer support for guidance.
Now that you’ve completed the installation process and learned how to maintain it properly, it’s time to indulge yourself in ultimate comfort and luxury with a rejuvenating bath experience every day.
Enjoy your new AV tub!jh.