You finish painting a room, admire the fresh colour, and assume the hard work is over. Then, a few days or weeks later, small bubbles begin appearing on the wall. Some look like tiny blisters. Others grow into raised patches that eventually crack or peel.
The first instinct is usually to buy another tin of paint and cover the damaged area. Unfortunately, that can turn a small repair into a recurring problem.
Bubbling paint is a symptom, not a diagnosis. It can result from moisture, poor surface preparation, incompatible paint layers, or a weak plaster surface. The right repair depends on identifying which problem is actually present.
Before scraping the wall or spending money on new paint, use the following checks to narrow down the cause.
1. Check Whether the Bubble Is Hiding Moisture
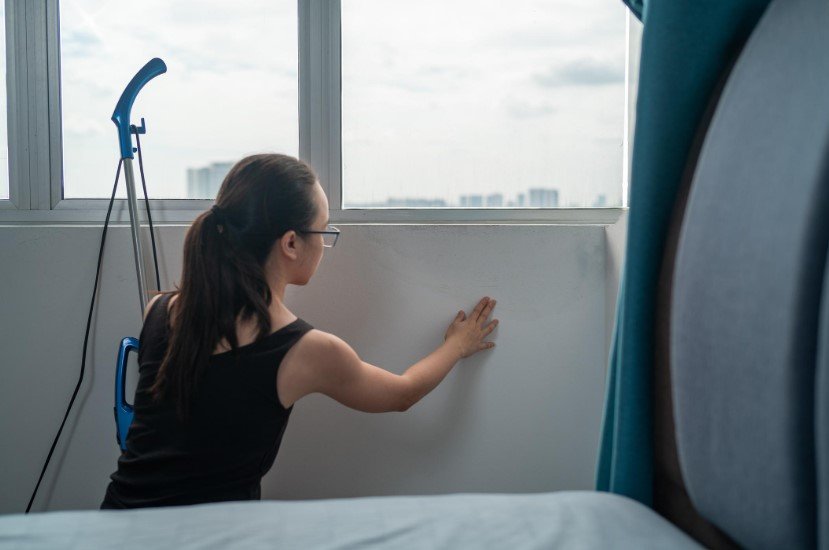
Moisture is one of the most important causes to investigate, particularly when paint bubbles appear near a bathroom, kitchen, roof, window, or plumbing line.
Water can weaken the bond between paint and the wall. As the coating loses adhesion, it may lift away from the surface and form blisters. However, not every bubble contains water, and appearance alone cannot confirm a leak.
Start by examining the location.
- Below a bathroom or water tank: Consider a leaking pipe, drain, waterproofing failure, or water entering from above.
- Around a window: Inspect the exterior sealant, window frame, and nearby wall for signs of rain penetration.
- Near the bottom of an exterior wall: Check whether rainwater, ground moisture, or a drainage problem could be affecting the wall.
- In a ceiling directly below plumbing: Investigate the pipework and connections before repairing the ceiling finish.
Look for additional clues, such as a persistent damp smell, recurring stains, soft plaster, or damage that becomes worse after rain or water use.
A moisture meter can help compare the affected area with a dry section of the same wall. It is a diagnostic aid, not a definitive leak detector; readings depend on the material and the instrument.
What to do: If you suspect an active leak, stop the water source and arrange the necessary repair. Do not seal the damaged area beneath fresh paint. Allow the wall to dry, then assess whether the plaster or other wall material needs repair or replacement.
The US Environmental Protection Agency recommends addressing moisture sources and drying wet materials promptly. Its mold cleanup guidance also advises against painting over mold.
2. Determine Whether the Problem Is in the Paint or the Wall
This is a useful check that homeowners often overlook.
A paint bubble can form because the paint film has separated from the wall. But sometimes the paint remains attached to a thin layer of plaster, filler, or old coating that is itself separating.
These are two different repairs.
If only the paint layer is lifting
The underlying wall may still be solid. The problem could involve dust, grease, an unsuitable primer, or a previous coating that did not bond properly.
Once the cause is corrected, the loose paint can generally be removed and the sound surface prepared for repainting.
If plaster or filler is coming away with the paint
The damage is more serious than the finish. You may notice a chalky layer, loose powder, cracks, or plaster that crumbles when gently examined.
In this situation, repainting will not restore the strength of the wall.
Remove unsound material carefully, determine why it has weakened, and repair the substrate with a suitable product. If the plaster is extensively loose or the wall remains damp, seek professional assessment.
A fresh coat of paint cannot make weak plaster structurally sound.
3. Look for a Painting Preparation Mistake
If the wall is dry and the underlying plaster is firm, poor preparation becomes a stronger possibility.
Paint needs a suitable surface to adhere to. Dust, grease, loose old paint, and incompatible finishes can interfere with that bond.
This is particularly relevant in kitchens, where cooking residue can collect on walls and on previously painted surfaces with a glossy finish.
Before repainting, check the following:
| Surface condition | Why it can cause trouble | What to do |
|---|---|---|
| Dusty wall | Paint bonds to loose particles instead of the wall | Clean and remove dust |
| Greasy surface | Contamination interferes with adhesion | Use an appropriate cleaner and rinse as directed |
| Loose old paint | The new coating can lift with the old one | Remove unsound paint |
| Bare or repaired plaster | The surface may absorb paint unevenly | Apply a compatible primer |
| Glossy old coating | New paint may not grip properly | Prepare the finish according to the paint manufacturer’s instructions |
Do not assume every wall requires the same primer. Choose one compatible with the existing surface and the paint you intend to use.
If you are unsure whether the old coating is compatible with the new product, check the manufacturer’s technical instructions or test a small prepared area first.
4. Check Whether the Paint Was Applied Under the Wrong Conditions
Sometimes the wall itself is not the main problem. The conditions during painting can affect how well a coating dries and adheres.
Common mistakes include:
- Painting a wall that has not dried after cleaning or plaster repairs.
- Applying another coat before the previous coat has dried sufficiently.
- Painting a surface that is excessively hot.
- Using a coating that is unsuitable for the wall or environment.
- Ignoring the temperature and humidity limits stated on the paint container.
Direct sunlight can heat a wall much more than the surrounding room. This may cause paint to dry too quickly and affect its finish.
Read the product label rather than relying on a universal drying time. Different paints, surfaces, and weather conditions require different application and curing periods.
If bubbles appear shortly after painting, record when the paint was applied, whether the wall was recently repaired, and what the weather was like. These details can help distinguish an application problem from a moisture issue.
5. Investigate Humidity and Condensation
Not all wall moisture comes from a leaking pipe.
Warm, humid indoor air can produce condensation when it meets a cooler surface. Bathrooms, kitchens, poorly ventilated rooms, and cold exterior-wall corners can be vulnerable.
For example, if a wall repeatedly becomes damp after hot showers, the moisture may be associated with condensation rather than a plumbing leak.
Check whether the affected area becomes damp after cooking, showering, or periods of poor ventilation. Also inspect corners and spaces behind large furniture, where airflow may be limited.
Practical improvements include:
- Use an exhaust fan that vents appropriately when showering or cooking.
- Improve airflow in rooms that remain humid.
- Avoid placing furniture tightly against a persistently damp exterior wall.
- Address cold surfaces or insulation problems where appropriate.
- Monitor indoor humidity if condensation is recurring.
The EPA recommends keeping indoor relative humidity below 60%, ideally within the 30–50% range, to help control moisture. Actual conditions vary by climate and building.
If the wall is persistently wet, do not assume ventilation alone will solve the problem. Investigate other sources of water as well.
How to Fix Bubbling Paint Without Repeating the Problem
Once you have identified and addressed the likely cause, follow a repair sequence rather than painting directly over the damaged patch.
Step 1: Protect the area
Move furniture away from the wall, cover nearby surfaces, and use appropriate protective equipment. If the damage is extensive or mold is present, avoid disturbing it until you know how it should be handled.
Step 2: Remove loose material
Use a suitable scraper to remove paint that is already lifting. Work carefully and stop when you reach a firm surface.
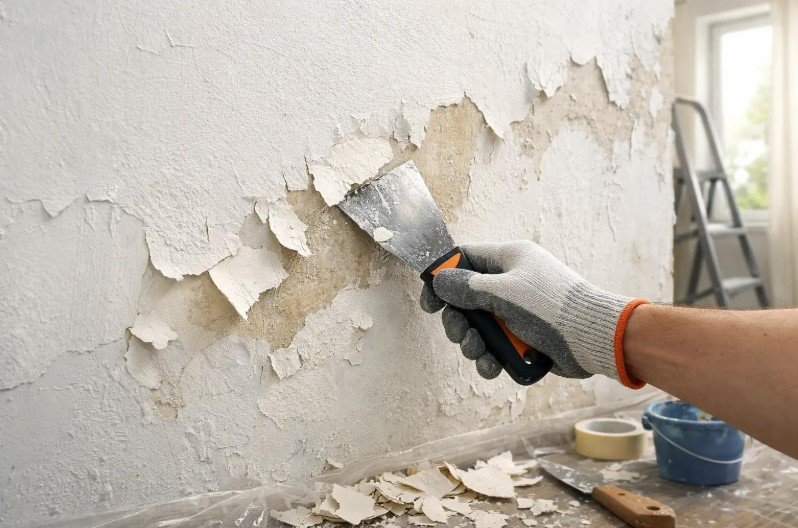
Do not aggressively scrape sound paint simply because it is nearby.
Step 3: Check the exposed surface
Look for dampness, soft plaster, powder, cracks, or further loose layers.
If the wall is wet, repair the moisture source and allow it to dry. If the substrate is damaged, repair it before moving on.
Step 4: Prepare the surface
Clean the wall as appropriate for the material and contamination. Remove loose dust and allow the surface to dry.
Sand rough edges where suitable, taking care not to create unnecessary dust. Use a compatible filler for small surface defects, and allow it to dry according to the manufacturer’s instructions.
Step 5: Prime and repaint
Choose a primer suitable for the repaired surface. A stain-blocking primer may be useful after a repaired leak, but it does not replace fixing the leak itself.
Apply the finish paint according to its instructions, allowing the required drying time between coats.
Step 6: Monitor the repaired area
Check the wall again after the repair. If bubbling returns, do not keep adding paint. Reassess whether moisture, substrate failure, or another unresolved problem is present.
When Should You Call a Professional?
A small patch of loose paint on an otherwise sound, dry wall may be manageable as a DIY repair.
Professional help is a better choice when:
- The wall or ceiling remains damp despite attempts to identify the source.
- Paint damage repeatedly returns in the same location.
- Plaster is crumbling over a large area.
- There is extensive mold or significant water damage.
- The affected area is near electrical equipment or wiring that may have been exposed to water.
- You suspect a roof, concealed plumbing, or building-envelope problem.
If water has reached electrical components, keep away from the affected area and arrange appropriate electrical assessment.
The Bottom Line
Bubbling paint is not automatically a sign that you bought poor-quality paint. It may indicate moisture, a weak surface, inadequate preparation, or unsuitable painting conditions.
The most reliable repair is to identify the cause, remove only the damaged material, restore the surface, and repaint after the underlying problem has been corrected.
If you remember one rule, make it this: never treat fresh paint as a substitute for repairing the wall beneath it.
That simple decision can prevent repeated repainting and help protect the home’s underlying surfaces.
Frequently Asked Questions
Can I paint directly over bubbling paint?
No. Loose paint should be removed, and the underlying surface should be checked and prepared. Painting over a blister usually hides the damage temporarily rather than fixing it.
Does bubbling paint always mean there is a leak?
No. Moisture is an important possible cause, but poor preparation, incompatible coatings, and application conditions can also produce bubbles. Investigate the location and condition of the wall before deciding.
Should I use waterproof paint to stop wall bubbles?
Water-resistant paint may be appropriate for certain surfaces, but it cannot repair a leaking pipe, failed waterproofing, or persistently damp plaster. Identify the source of moisture first.
How long should a repaired wall dry before repainting?
There is no single drying time for every wall. It depends on the material, thickness, moisture level, ventilation, and product instructions. Confirm that the wall and any repairs are sufficiently dry before applying primer and paint.
Is it safe to scrape a moldy wall myself?
That depends on the extent of the mold, the material involved, and the source of moisture. Avoid disturbing extensive mold or contaminated porous materials. Follow appropriate cleanup guidance and consult a qualified professional when the damage is substantial or you are uncertain.